
When your vehicle has a dead battery, it could ruin your plans for the day. You might want to consider replacing the current battery, but you can recharge the battery instead. Luckily, this solution does not require special skills or tools.
Do you want to learn how to charge a car battery? If yes, you can use this guide to how to charge a car battery at home.
Two Common Ways to Charge a Car Battery
If you want to make a car battery work, you can use these two methods to restore it to its working order. These methods include
- Connecting the battery to a charger
- Using jumper cables
Now let’s show you how to charge a car battery with a charger.
How to Charge a Car Battery with a Charger
Step 1: Work with Protective Gear

Wear a pair of protective eyewear to prevent potential spills, debris, and sparks from entering your eyes. You will also need gloves to protect your hands, especially when you want to learn how to charge a car battery.
Remember to work in areas with proper airflow and lightning. Although, glove might not be necessary, you could decide to put it on to protect your hands from sharp objects while working. You should also ensure that you perform the task in a child-free zone.
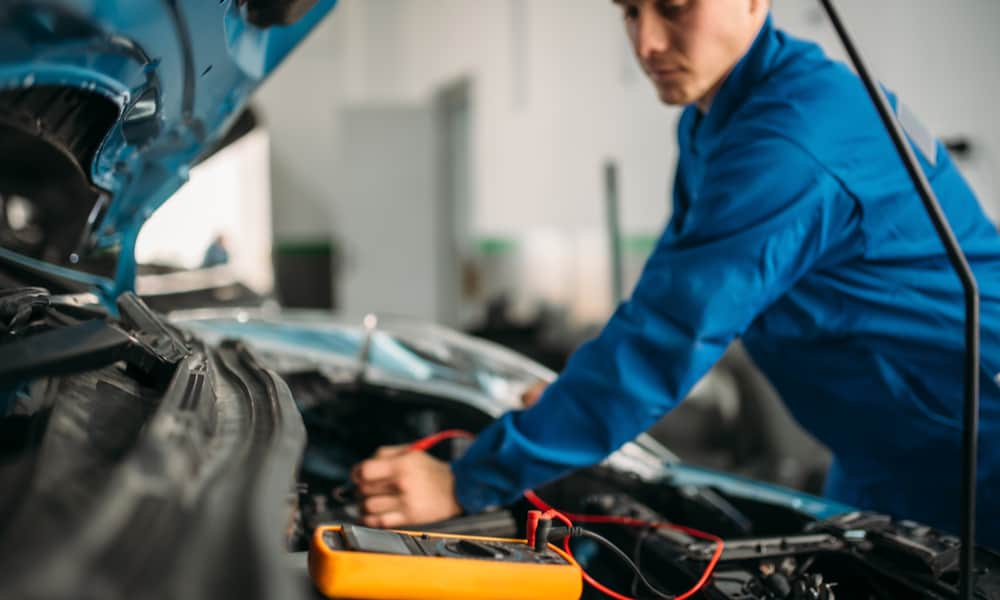
Step 2: Whip out the Charger for the Car Battery
Invest in a charger that suits your battery model. Luckily, stores stock chargers that can work on most car batteries except the gel cell variants. If you want a quick top-up, choose models that support fast charging while trickle chargers offer slow but dependable top-ups.
Consider choosing a smart charger that prevents overcharging. But if you prefer older models, take out the charger as soon as you have a full cell.
Before using a battery charger, check if it fits your model by checking the manual. During a charge (with any model), monitor the charger to avoid overcharging and possible damage to the car battery.
Step 3: Take Out the Battery from Your Car
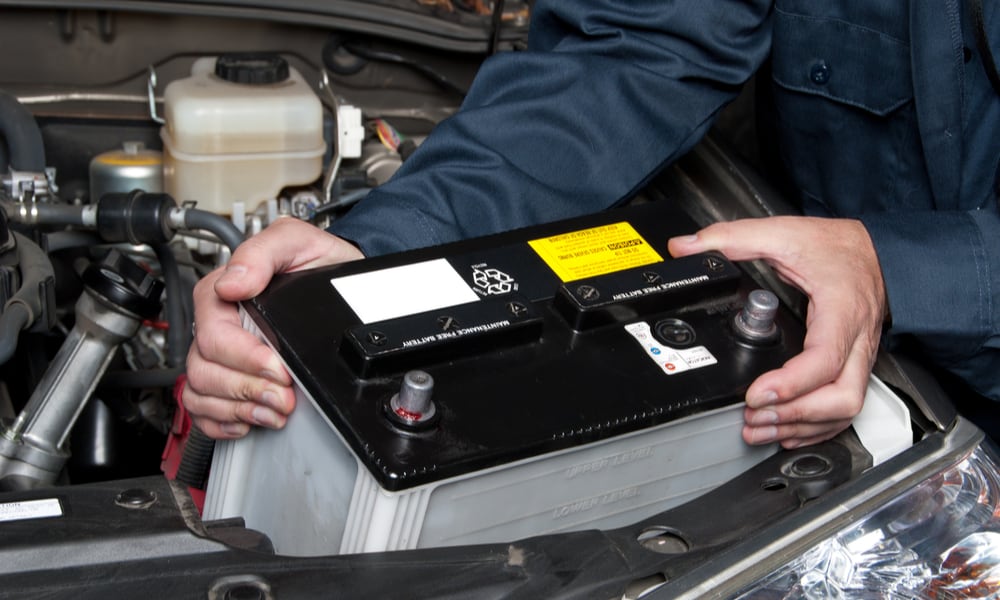
Before performing any repairs on a car, try to remove the battery from its engine. Moreover, you can restore the power on a low battery without disconnecting the cell from the trunk. But if you have a cell placed in a tight or awkward spot, take it out and connect to a charger.
Look for the spot in your engine that houses the cell. Grab and study the owner’s manual for your vehicle. If you don’t have this material, check the hood or trunk of the car. When you find the battery, pull out the negative and positive cables before taking it out from the vehicle.
Wipe the debris on the terminals of the disconnected battery as dirt on the terminals can result in a weak charge.
Allow a perfect connection by wiping the terminals with baking soda and sandpaper. If you can’t find this paper, use a wet cloth for the cleanup. Finally, confirm if the terminals consist of bare metals before moving forward to next step of how to charge a car battery.
Step 4: Hook Up the Battery with the Charger
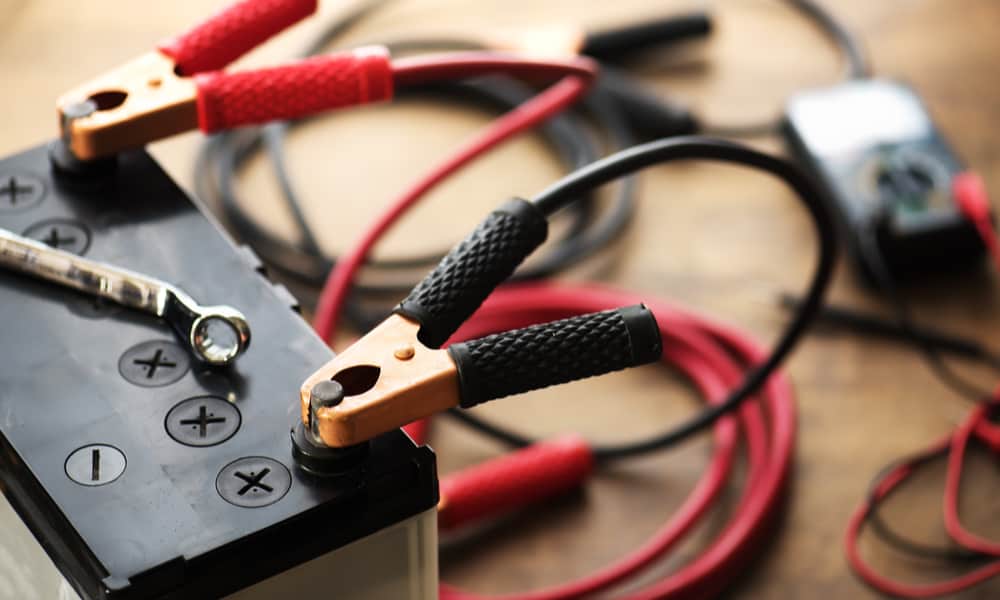
Ventilate the garage by opening the windows or doors. Then connect the charger to a wall socket before bringing out the battery. The black cable of the charger and place it to the negative terminal on the battery. Repeat this procedure with the red cord.
Since wrong connections can damage the battery or cause a fire, try to fix the cables with corresponding wires. Remember to cross-check, particularly before powering up the charger.
Step 5: Prepare the Charger Settings
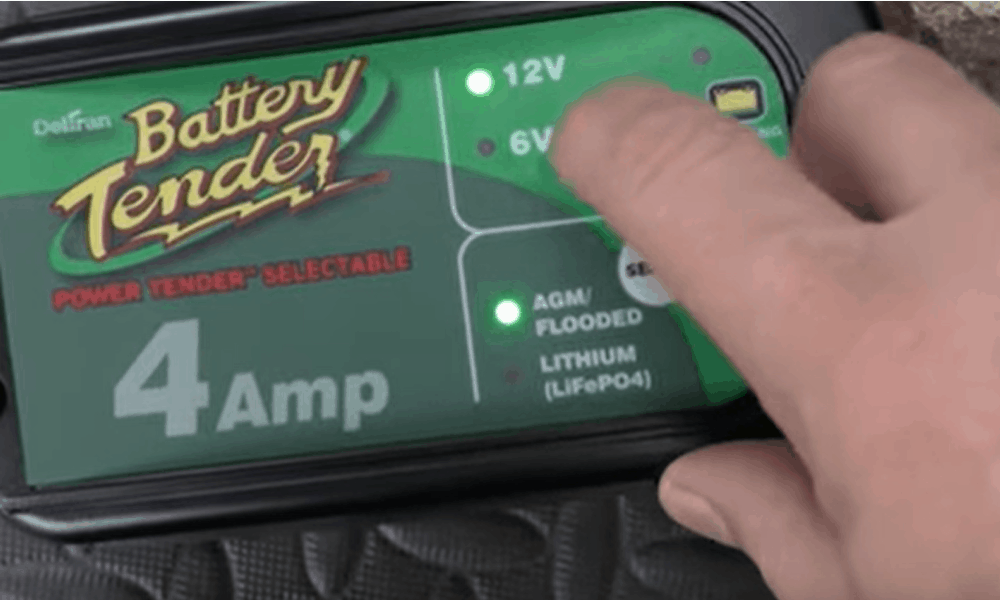
If you want to use a digital charger to power up the battery, it’s possible to select the voltage level. But if you prefer the older variants, you can only switch on and off the unit.
Some models also allow you to select the speed of the charging process. On these chargers, a rabbit symbol denotes a fast charge while a tortoise shows a slow one.
If your battery died within the hour, a fast charge comes as a perfect way to restore it to the full capacity. But if the battery died weeks ago, choose the slow charge option.
Step 6: Confirm the Condition of the Battery
Confirm if the battery charges appropriately, particularly after a few hours. If you use a digital model, a display tells you if the battery stores energy properly. Typically, a percentage on display provides this information.
Since older models do not have readouts, disconnect the battery and measure its voltage with a voltmeter. Perform this task by placing the negative and positive cables of the voltmeter on the corresponding terminals of the cell.
Check the readings provided by the voltmeter. If you have a voltage that fits the battery, then you have a successful charge. But if you got a poor reading (with the voltmeter or digital readout), consider fixing the battery or getting a new one.
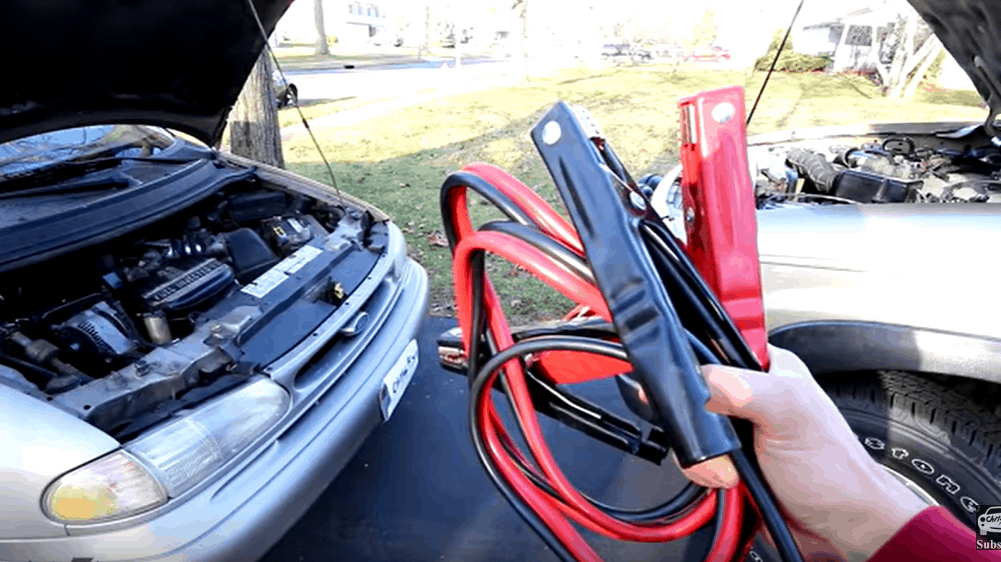
How to Charge a Battery with Jumper Cables
This method involves learning how to charge a car battery with another car. The other vehicle will need to use a functioning battery to supply power to the dead battery.
Check the position of the batteries on the vehicles. Then park the “charging” vehicle close to the one with the weak battery. Remember to park in a spot that allows you to connect both batteries easily and properly. To avoid unexpected movements, activate the parking brake on both cars.
Step 1: Whip Out the Jumper Cables

As with learning how to charge a car battery with charger cables, try to connect the negative and positive ends of the jumper cables to the corresponding terminals on both batteries. Before taking this step, you should also turn off both vehicles and avoid cables from entering the engine bay.
Step 2: Start Charging the Battery
Charge the battery by switching on the engine on the vehicle with the good battery. When charging the battery, do not release its brake. Leave the engine running for some minutes and turn on the other car.
Step 3: Remove the Jumper Cables and Let the Battery Run
When the vehicle with the charged battery starts, allow running for a few minutes. Within this period, its alternator will offer extra energy to the battery. Now, drive the vehicle for a few minutes before switching off the ignition.
But if you remove the cable and the car goes off, head to the terminals of the battery and look for loose connections.
Tips for Handling a Battery that Does Not Charge
- Take the product for tests at an auto parts store.
- Look out for faulty alternators as they can offer weak charges. Moreover, they cannot provide the energy needed to keep the engine running.
- When turning on the ignition, check for clicking noises. If you find any, then the battery does not have enough energy to power the engine.
Wrap Up
If you have a weak battery in your vehicle, the engine will not start. You can handle this problem by learning how to charge a car battery without another car. You could even skip this option and use jumper cables.
If you want to use the first method, use a digital or conventional charger. You should also avoid accidents by wearing suitable safety gears and connecting the terminals correctly. For jumper cables, park the vehicles correctly to allow proper charging.
We hope you enjoyed this article, and please feel free to share it with your friends on social media.